Author Archives: Client

Vasilopita

Prep and Cooking Time: 1hour 20min
Skill: Super Easy
Servings: 8 pieces

With all our Christmas Day baking done, it’s time to focus on the New Year’s festivities. It’s not New Year’s without a Vasilopitsa, which translates to St. Basil’s pie. This New Year’s bread or cake containing a hidden coin is served in Greece, Eastern Europe and the Balkans to celebrate and bless the coming of the New Year.

The story goes that St. Basil, Bishop of Caesaria (370AD – 379AD), asked the citizens of Caesaria to donate money and gold in an attempt to prevent the takeover of their city by the Roman Empire. They presented whatever they could and would rather live in poverty than under the rule of the Roman Empire. The Romans were so amazed by this unselfish act of giving that they completely forgot to attack Caesaria. St. Basil then thought to bake many, many loaves of bread and conceal the money and gold he received within each loaf and hand them out to the citizens of Caesaria. It’s then believed that by a miracle, every citizen received precisely what they gave!
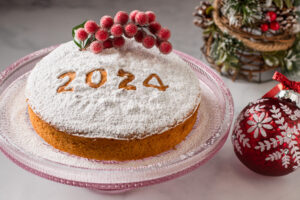
Over the years, the vasilopita has evolved from a loaf of bread to a cake and even a pita. Today it depends on what part of Greece you’re from, my mother-in-law, from Florina, bakes a tiropita, and my aunt from Athens bakes a cake. In my home, we usually cut up to 3 vasilopites every New Year; one on New Year’s Eve, one at home on New Year’s Day and one on New Year’s Day at our family lunch/dinner.

Cutting the vasilopita does involve some ceremony. Usually, the host of the event/house cuts the vasilopita and names the recipient of each piece. First, the host says a prayer and scores the top of the cake with a cross. The first piece is for Jesus Christ, the second for the Virgin Mary, the third for the home and the fourth for the host. Then every slice after that is served to all the attendees, from the oldest down to the youngest. Whoever is lucky enough to get the coin will be blessed with extra good fortune in the coming year. There are many variations of how to cut a vasilopita; however, you can cut it up any way that feels right for your family.

This recipe comes from Maria Takas’ Yiayia Marika. Maria made this with gluten-free flour by replacing the 2 cups of pastry/cake flour with 1 3/4 cups of gluten-free 1-to-1 flour, she recommends Bobs Red Mill 1-to-1 Gluten Free Baking Flour. She made this vasilopita for me when we made our reel. I don’t eat many gluten-free cakes, but let me tell you, you couldn’t tell this was a gluten-free cake at all, and it was sooooo light and moist. It doesn’t happen often, but I was speechless lol!

If your schedule is super busy, you’re not a baker, or you just want to spend more time with family and friends this Holiday Season, we got you! Click here to preorder some Serano Bakery Vasilopites and any other goodies you may need this Christmas and New Year’s.

Things You’ll Need

• 8” round cake pan
• High speed mixer
• Zester
• Measuring cups and spoons
• Mixing Bowls
• Spatula
• Parchment Paper
• Scissors
• Pam Original Cooking Spray
• Numbers (paper or wooden)
• Winter Berries for decor (optional)
• Dime
• Aluminum Foil

Ingredients
• 1/2 cup unsalted Butter (softened)
• 1 cup Sugar
• 3 Eggs (separate yolks from whites)
• 1 cup Milk
• Zest of 1 Lemon
• 1/2 tsp Vanilla
• 3 tsp Baking Powder
• 2 cups Cake & Pastry Flour or 1 3/4 cups 1-to-1 Gluten Free Flour
• Icing Sugar (to decorate)

Instructions
1. Preheat oven to 325℉.
2. Sift together flour and baking powder and set aside.
3. With a mixer cream butter and sugar together.
4. With the mixer on low add egg yolks one at a time until combined.
5. Add vanilla, lemon zest and milk, continue to beat on medium high until well incorporated.
6. With the mixer on low slowly add the flour until the batter comes together.
7. In a separate bowl whisk together the egg whites until they are thick and fluffy.
8. Using a spatula fold egg whites into the cake batter until completely incorporated.
9. Pour mixture into a pre-greased baking pan.

10. Take a dime and wash it very carefully using hot soap and water. Then dry it and completely cover it using a small 1” square piece of aluminum foil.
11.Take the dime and lightly dredge it in a bowl of flour, then place it into the cake batter.
12.Bake at 325℉ for 60 minutes.
13.Remove from oven and let cool.
14.Place cake on a serving plate/cake stand.
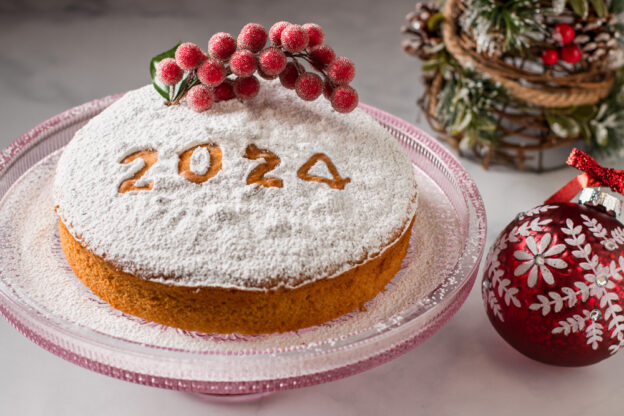
15.Use cut out 2023 numbers (you can cut them out of paper yourself or use wooden ones, we found ours at our local craft store) and place on top of the cake and generously sprinkle with icing sugar until completely covered. Remove numbers and decorate with Christmas berries.

Notes: We’ve halved the original recipe because we used a small 8″ round aluminum cake pan that serves eight pieces of cake, but if you require a larger cake, go ahead and double it. Bake at 350℉ for 60 minutes.

Tips: We found that whipping the egg whites separately and then folding them into the cake batter made this cake really fluffy and very moist.

Merry Christmas and Happy New Year!!!

Serano Watermelon Salad: A Summer Delight

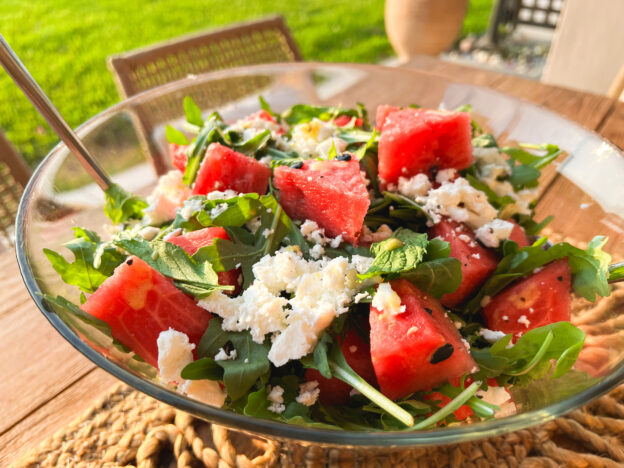
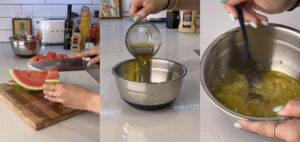
We’re in Greece and as the sun continues to shine here the summer heat beckons for refreshing dishes, there’s nothing quite like a vibrant watermelon salad to cool off and satisfy your taste buds. Whether you’re enjoying a family picnic, a backyard barbecue, or simply looking for a light and delicious meal, our Serano Watermelon Mint Salad is the perfect choice. Packed with flavors, textures, and a touch of Mediterranean inspiration, this salad promises to be a highlight of your summer dining experience.

INGREDIENTS FOR DRESSING:
• ¼ cup orange juice
• 2.5 tbsp Greek honey
• 1/3 cup extra virgin olive oil
• 1.5 tsp Dijon mustard
• 1/8 cup apple cider vinegar
• ½ tsp salt
• Coarse ground black pepper to taste

FOR THE SALAD:
• 150g arugula
• 1 cup whole walnuts
• 10 fresh mint leaves
• ½ small watermelon
• 150 manouri cheese (or feta cheese)


FOR THE SALAD DRESSING:
1. In a bowl or a blender whisk together the orange juice, honey, Dijon mustard, and apple cider vinegar until well combined.

2. Slowly drizzle in the extra virgin olive oil while whisking to emulsify the dressing.

3. Season with salt and a generous amount of coarse ground pepper and whisk again. Set aside.

SALAD ASSEMBLY:
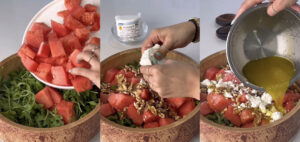
1. Wash and dry the arugula, then place in a large salad bowl.

2. Cut the watermelon into bite sized cubes and add them to the bowl.

3. Tear the min leaves into smaller pieces and add them to the salad.

4. Crumble the manouri cheese (or feta) over the salad.
5. Top with walnuts.

FINAL TOUCHES:

Drizzle the prepared dressing over the salad, using as much or as little as you prefer and gently toss the salad to ensure the ingredients are evenly coated with the dressing.

Embrace the essence of summer with our Serano Watermelon Mint Salad. Bursting with juicy watermelon, vibrant arugula, refreshing mint, and the nutty goodness of walnuts, this salad is a symphony of flavors and textures. The tangy-sweet dressing brings everything together, creating a truly memorable culinary experience. Whether you’re enjoying a leisurely afternoon by the pool or hosting a festive gathering under the sun, this salad is a fantastic addition to your summer menu. So, grab a fork and savour the taste of summer in every bite.
Enjoy!!!

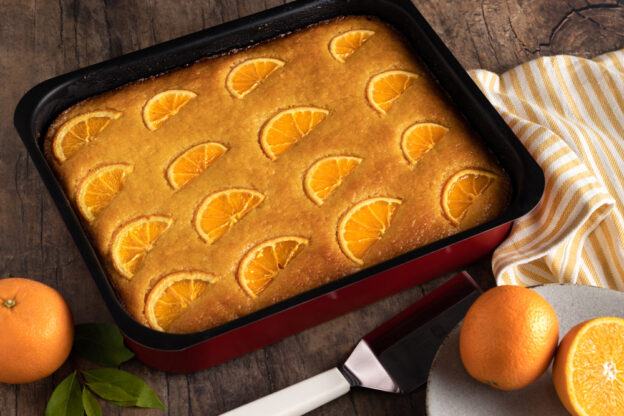
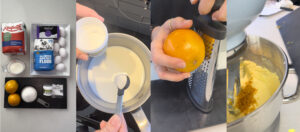
Portokalopita No. 5: A Greek Delight for Citrus Lovers

Are you craving a delicious dessert that bursts with the vibrant flavors of citrus? Look no further than Portokalopita No. 5, a mouth-watering orange cake soaked in a delectable orange juice-based syrup. This delightful Greek dessert is perfect for the BBQ season and will leave your taste buds craving more. Join me on a culinary journey as we explore the recipe for this tantalizing treat.

As dedicated recipe seekers, we strive to find the best recipes and create scaled-down versions that are easy to make at home. After rigorous testing (five attempts, to be precise), we finally achieved perfection with Portokalopita No. 5. The first two attempts lacked the desired rise due to the wrong choice of filo dough, the third was closer but still missing something, and the fourth had a runny syrup. But fear not, the fifth time was indeed the charm! This version incorporates dried-out filo dough crumbled into tiny filo flakes, giving the cake its unique texture and taste

Let’s dive into the ingredients you’ll need to recreate this citrusy delight:

SYRUP:
• 625g of freshly squeezed oranges (6-7 medium oranges)
• 200ml water
• 1kg sugar
• 2 cinnamon sticks
• 1oz Metaxa (a Greek brandy)
• Orange peel of two oranges julienned

CAKE:
• 14 sheets/565g of fine filo dough (not the extra fine one)
• 300g sugar
• 250g olive oil (not extra virgin)
• 400g Greek yogurt (2% or higher fat content)
• 6 eggs
• 25g baking powder
• 2 medium oranges (whole)
• Zest of two oranges (use the oranges from the syrup before juicing)
• 1 tbsp vanilla powder or 2 tsp pure vanilla extract
• 8 thin orange slices, cut in half, for decoration

THINGS YOU’LL NEED:
• 13”x10” baking pan
• Stand or hand mixer
• 3 cookie trays
• 1 large sauce pan
• 1 medium sauce pan
• Potato peeler
• Sharp chopping knife
• Citrus zester
• Juicer
• Spoon/whisk
• Immersion blender or food processor
• Extra large mixing bowl
• Silicone/rubber spatula
• Measuring cups
• Measuring spoons
• Measuring scale

STEPS:
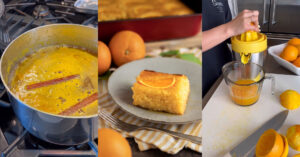
1. In a large saucepan, boil two whole oranges, including skins, and then reduce heat and let simmer for 1 hour. Once done, remove the oranges from the water and let them cool. You can use an ice water bath if needed.

2. Peel the rind of two oranges using a potato peeler, careful not to cut too deep into the white part of the orange and julienne (cut into skinny strips).

3. Zest two oranges (for cake mixture) and set aside covered with plastic wrap not to dry out.

4. Juice oranges to get 625ml of freshly squeezed orange juice. You can use store-bought orange juice, but make sure it’s freshly squeezed; this will make all the difference in having that freshly squeezed orange taste. In Toronto, you can find freshly squeezed orange juice at most local grocery stores; and at Café Serano.

5. In a medium-sized saucepan, add sugar, water, freshly squeezed orange juice, julienned orange rind, Metaxa and two cinnamon sticks from the list of ingredients for the syrup. Stir and boil; once boiling, reduce heat to medium/low and let simmer for about 2 minutes. Remove from heat and set aside to cool.
*Once cooled, using a fine mesh strainer and completely strain the syrup.

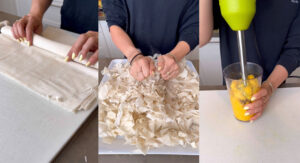
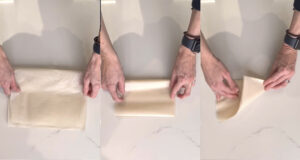
6. Take 14 sheets/565g of fine filo dough (not the extra fine one. This gave us the flattest cakes in our test kitchen) and fold in half, then roll until you have a roll of filo dough. Cut 1” sections and then carefully separate them so that there are no clumps of filo ribbons. In Toronto, you can come to the bakery and purchase our in-house filo dough; using this filo dough gave us the best results. We also tried it with the store-bought Krinos baklava filo dough, which worked well.

7. Divide and space out the filo ribbons over three baking trays and let air dry for several hours or dry in the oven at 190° F until completely dry (45-60 min depending on your oven). Whether air drying or oven drying, you’ll need to go in and toss the filo ribbons a few times to ensure they are adequately separated during the drying process so they don’t dry in clumps.

8. When the filo ribbons are completely dry, crush them with your hands until they are tiny little flakes.

9. Take the boiled oranges and slice them into quarters. Remove any seeds and white stems inside and squeeze out all the juice. Discard the liquid so that the only thing left is the skins and pulp. Using an immersion blender/food processor, reduce to a paste and set aside.

10. Prepare eight thin slices of oranges and cut them in half; set aside.

11. Grease a 10”x 13” cake pan. If you don’t have a 10” x 13” cake pan, you can use a 13” x 9” as long as it’s at least 3” deep. Use a metal baking pan; otherwise, your cake won’t bake properly.

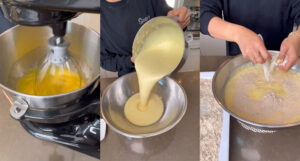
12. Using a stand mixer, whip together eggs, sugar and oil for 10 min on medium-high until double in size, pale, light and fluffy this is very important to get a good rise on the cake. You can use a hand mixer, but it will take much longer.

13. Change to a paddle attachment, and on low, stir in the baking powder, yogurt, orange puree, orange zest and vanilla powder/vanilla extract, ensuring each ingredient is incorporated before adding the next. Do not overmix. If you’re using a hand mixer, add each ingredient one by one and beat on low before adding the next.

14. Pour mixture into a larger bowl before adding the filo flakes. You could add the filo flakes into the original mixing bowl if using a hand mixer, but because we used a stand mixer, we wanted enough space to ensure we we’re not getting clumps of filo flakes in our cake mixture.

15. Slowly add the filo flakes in small batches and carefully fold in each batch before adding the next. You want to ensure that the filo flakes are fully coated with the cake mixture and that there are no clumps. Be careful not to stir as this will overmix the cake mixture – j folds only!

16. Pour the batter into the baking pan and smooth out.

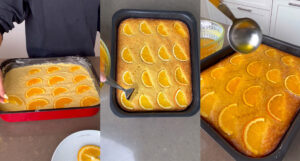
17. Decorate the top with orange slices and bake in the oven at 325°F for approx. 55min or until the top of the cake is a nice golden brown and bounces back when you touch it.

18. Once baked, remove from oven, and while hot, use a long-pronged fork or skewer and poke right through to the bottom of the cake several times.

19. Take the cooled orange syrup and pour/spoon it over the hot cake—reserve about ½ cup for serving.

20. Let stand for at least 1 hour before serving.

TIPS

When making this cake, look for medium sized sweet oranges with a thin skin/peel. I tried this recipe with larger thick-skinned oranges, and it was no bueno, I prefer the Costco oranges (not the Cara oranges). Place the cake in the fridge overnight for a lovely cool cake, perfect for serving on a hot day. Reserve some of the syrup and spoon some over each slice when serving. This cake is also impressive with a scoop of vanilla gelato and some of the orange syrup spooned on top. If you love oranges like us, you’ll love this cake!!!

ENJOY!!!

If you have a recipe you’d like to share with us, please email it to us at [email protected].  If we select your recipe and feature it in our blog, you will receive a $50 Serano Bakery gift card that you can use in-store or online. You will also be given full credit for contributing the recipe and may even be featured in one of our Instagram cooking reels.

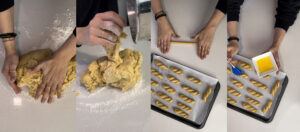
Koulourakia

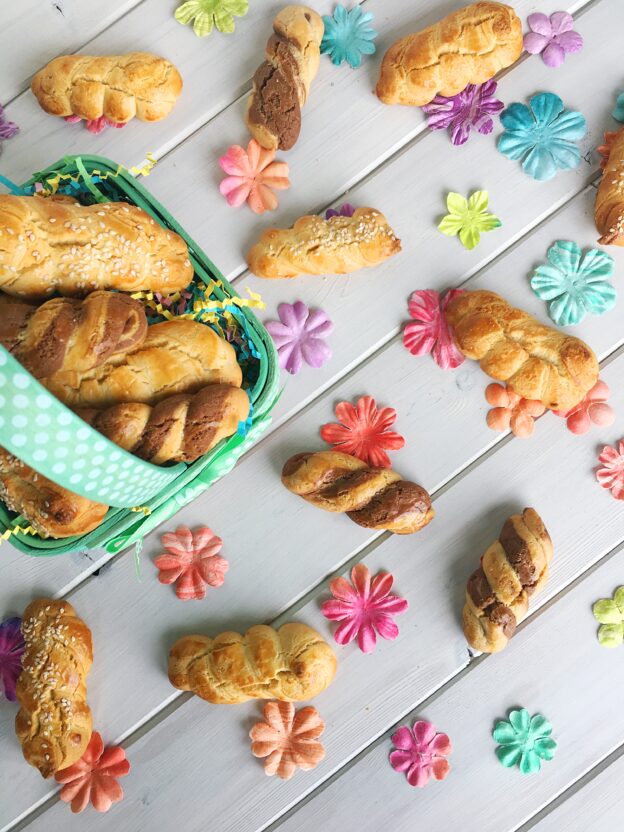
Koulourakia are traditional Greek butter cookies made at Easter and are great to make with the kiddies for family and friends to enjoy on Easter Sunday. Flavoured with orange zest and vanilla these are perfect to enjoy any time of year and here at the bakery we offer them year round. There are different variations with sesame seeds and we even make them marbled with a little cocoa powder added to a portion of the dough before shaping them into either twists or rounds.

Ingredients
• 250g butter
• 2 cups of sugar
• 13g bakers ammonia powder
• 1/2 cup lukewarm milk
• 4 eggs
• 2g vanilla crystals
• Zest of one orange
• 1kg all-purpose flour
• 2 egg yolks
• 1tbsp water

Using either a stand or hand mixter cream butter and sugar together until light and fluffy.
Warm the milk and add the bakers ammonia, stir to dissolve.
Add eggs to the creamed butter one at a time and incorporate before adding the next egg.
Add vanilla powder.
Add orange zest.
Add the ammonia milk mixture and combine.
Add the flour a little at a time and incorporate. If your mixer has a dough hook you can use it here otherwise once the flour is combined remove from mixer and kneed for about 2-5 minutes and set aside for 30 minutes to rest.

In a bowl mix egg yolks with water to make an egg wash.
After the dough has rested, take a small piece and roll out into a cord about 7 inches long. Then shape your cookies by folding and twisting together or in an S shape or really any shape you like.
Brush egg wash over the cookies covering completely and bake in the oven at 400F for 15-20 minutes until golden brown.

Enjoy!

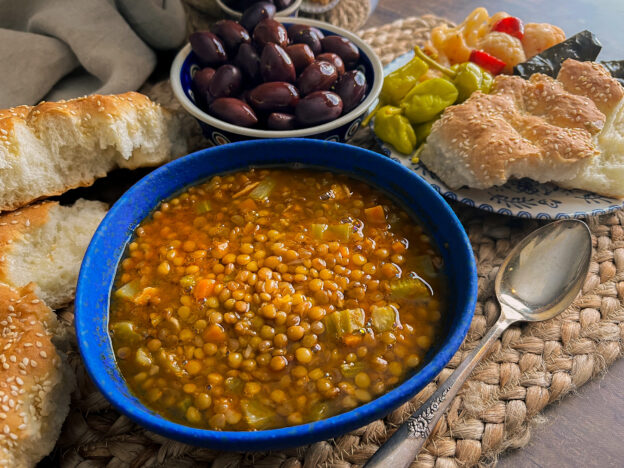
Greek Lentil Soup a.k.a Fah*Kes

Prep Time: 65 min
Skill: Super Easy
Servings: 5

With Lent upon us and that fact that winter is no where near being done with us, nothing says warmth and comfort more than a delicious and nutritious bowl of lentil soup or as we call it fah*kes. This vegan rustic soup has been feeding generations of Greek families and is one of the easiest and very filling meals you could make!

Lentil soup can sometimes get thick depending on the lentils you use as certain brands need more water and a longer cooking time. With this recipe you might need to add more water if you want your lentil soup to have more of a soup-like consistency. You can adjust the water right before you add the salt if needed.


Ingredients
• 450g lentils
• 8 cups water
• 1 large onion, chopped
• 2 carrots, chopped
• 2 celery stalks, chopped
• 3 garlic cloves, sliced/minced
• 1/4 cup olive oil
• 1 generous soup spoon of tomato paste
• 2 bay leaves
• Salt to taste
• Red wine vinegar, for serving

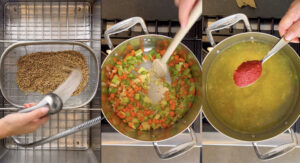
Rinse lentils under cold water in colander and drain.
Add olive oil to a large pot and sauté onions, carrots, celery and garlic for 2-3 minutes on high.
Add lentils, water, tomato paste and bay leaves and bring to a boil. Reduce heat and simmer covered for 45 min or until lentils are tender.
Add salt and continue cooking for another 15 min.
Serve with a splash of red wine vinegar.

This soup is one of our favourites and Yiayia makes it for the staff weekly. You can serve it with rustic bread, kalamata olives, toursi (pickled vegetables) and of course with some feta cheese (lent excluded). We added some spicy pickled cauliflower to ours and it blew our socks off, it was soooo good!

Enjoy

Black-Eyed Beans & Spinach

Prep Time: 60 min
Skill: Super Easy
Servings: 5

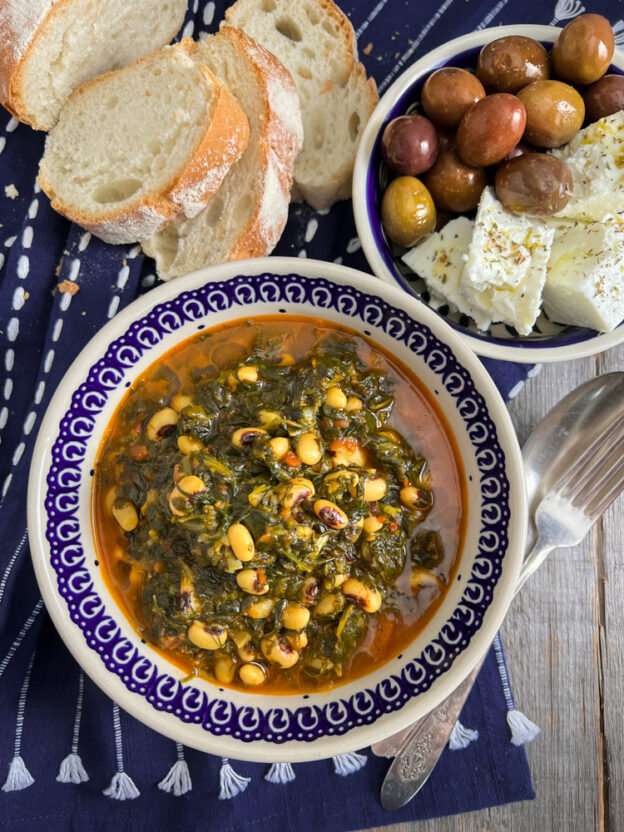
Going into 2023 we’re all trying to eat healthier. This black-eyed bean and spinach recipe, a twist on the classic spanakorizo (spinach and rice) is the perfect Mediterranean diet meal to fill you up. It’s quick, easy and absolutely delicious and comes to us from none other than our girl Gina who manages our market area.

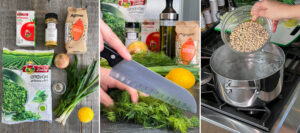
Ingredients
• 1 kg bag Barba Stathis frozen and chopped spinach
• 250g Agrino black-eyed beans
• 1 500g box Barba Stathis grated tomatoes
• 100g olive oil
• 3 fresh green onions (only the white part) chopped
• 1 medium cooking onion chopped
• 80g fresh dill chopped
• 1tsp salt
• 2tbsp Serano vegetable seasoning
• Zest of 1 lemon
• Juice of 1 lemon
• 250 g of water
• Pepper to taste

Instructions
1. Boil the black-eyed beans in 4 litres of water for 30-40 min until tender. Drain and set aside.
2. Add oil to a pot and heat on medium high, then add chopped onions and cook until translucent.
3. Add frozen spinach and bring to a boil.
4. Once spinach is boiling add the black-eyed beans, chopped dill, grated tomato, salt & pepper, vegetable seasoning, lemon zest, lemon juice and water and cook on medium low for 10 minutes
5. Drizzle with olive oil and serve with some olives, feta cheese drizzled with olive oil and oregano and some village style bread.

Kourabiedes

Prep & Cook Time: 2 Hours
Skill: Easy
Servings: 32 pieces @35g each

If melomakarona had a sidekick, it would definitely be kourabiedes or is it the other way around? The big debate is melomakarona or kourabiedes, which do you prefer? Personally, I love them both and can’t imagine a Christmas without them. These delicious melt-in-your-mouth almond shortbread-like cookies covered with icing sugar are the perfect accompaniment to your coffee or tea.

It’s believed kourabiedes originated in Persia during the 7th century and found their way to Greece during the Ottoman Empire. There are many different ways of making kourabiedes. In Greece, they are made with chopped/ground almonds and cognac and sometimes scented with rose water. You can substitute the cognac with ouzo and even use pistachios instead of almonds. Making kourabiedes is relatively simple; however, it does take some practice as they can spread out flat or be too dense.

Let’s get started!

The two things I found when making these kourabiedes at home are ensuring the butter’s temperature and shortening be just right. The original recipe I received called for the butter to be at room temperature; however, leaving the butter out overnight yielded a yummy but flat spread-out cookie. It’s best to chill your shortening and have your butter so that you can leave an imprint with your finger. Additionally, I cut the butter and shortening into cubes.

First, you’ll need to measure the ingredients and sift the flour. The first time I made these kourabiedes, I chopped the blanched almonds in my food processor, which made them almost like almond flour. The second time I made them, I hand-chopped sliced blanched almonds to nearly a powder. I prefer the sliced hand-chopped almonds better because you get more of a nutty crunch, but both ways are equally yummy. You can also toast your sliced almonds in the oven ahead of chopping to add more flavour to your cookies but make sure to toast them only a little so they don’t taste burnt or bitter.

With a high-speed mixer, beat the butter and shortening on high for 4 minutes. Then add the icing sugar, semolina, baking powder, cloves, brandy, vanilla, and lemon zest and beat for an additional 4 minutes. Now because I made these SEVERAL times to get them just right, the last batch I made, I decided to add 1 tsp of almond extract as well. That just took my kourabiedes over the top; they were yummy, like rock star status, lol!

On low beat in the flour 1/3 at a time then beat on high for 5 minutes. At this point, you need to check the consistency of your dough. Is it soft and sticky, or is it crumbly? If the dough mixture is too sticky (usually if you hand chop your sliced almonds), slowly add some more sifted flour. If the dough mixture is too crumbly (usually with food-processed almonds), add a tbsp of cold water until your dough comes together. You want to roll the dough into a ball without it sticking to your hands.

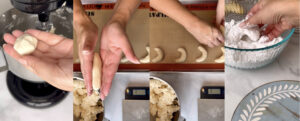
Mould the cookies into 35g crescents or 40g round balls with a thumbprint in the middle. Place moulded cookies on a parchment/silicon-mat covered cookie tray about 1.5″ apart and bake at 375℉ for 12-20 minutes until set and edges just start to brown.

Let cookies cool on the baking tray, and then, in a bowl with a generous amount of icing sugar, dredge each cookie in the icing sugar. Using a fine mesh strainer add more icing sugar if desired.

You can make these ahead of time and store the “naked” kourabiedes in an airtight container until you’re ready to serve or give away, and then you can add the icing sugar.

And if your schedule is super busy, you’re not a baker, or you just want to spend more time with family and friends this Holiday Season, we got you! Click here to preorder some Serano Bakery kourabiedes and any other goodies you may need this Christmas. Live out of town and want to order some of our cookies and other goodies to be delivered to you or even shipped to your family and friends; we got you covered here too! Click here to order your Serano Bakery kourabiedes.

Ingredients
• 450g sifted all-purpose flour
• 140g butter (just at room temperature)
• 150g shortening (at room temperature)
• 140g icing sugar + more for sprinkling
• 1tbsp fine semolina
• 1tbsp baking powder
• 1/2tsp ground cloves
• 1 tbsp cognac
• 1 large pinch vanilla crystals/vanilla powder or 1tsp vanilla extract
• Zest of 1/2 lemon
• 100g of chopped almonds
• 1to 2 tbsp water (if needed)
• 1tsp almond extract (optional)

Note: This recipe and not the recipe for kourabiedes we use here at the bakery; however it is very similar.

Things You’ll Need
• Measuring scale
• Stand/Hand Mixer
• Sifter
• Spatula
• 3 Baking trays
• Parchment paper or silicon baking mats
• Measuring spoons
• Zester

Instructions
1. Chop Almonds.
2. Sift Flour.
3. With a high speed mixer beat butter and shortening on high for 4 minutes.
4. Add icing sugar, semolina, baking soda, vanilla, cloves, brandy, lemon zest, almond extract (optional) and beat for an additional 4 min.
5. Beat in flour on low 1/3 at a time.
6. Add almonds and beat on high for 5 minutes.
7. Mould a 35g crescent or 40g ball with thumb imprint and place on a baking sheet approximately 1.5” apart and bake at 375℉ for 12-20 minutes until edges begin to brown.
8. Let cookies cool on cookie tray
9. Once cookies are cool dredge in a bowl of icing sugar. Sprinkle with more icing sugar if desired.

Tips:
1. Make sure you cool the shortening and bring the butter to a temperature where you can leave an imprint of your finger. If the dough mixture is too sticky, add some more sifted flour.
2. If the dough is too crumbly, add cold water and continue to bead and well incorporated.
3. Store in an airtight container.

Before adding the icing sugar, you can make your kourabiedes and store them in an airtight container. You can enjoy these without icing sugar and dip them in melted chocolate! They can even be frozen (without icing sugar).

Enjoy!

Melomakarona

Prep Time Syrup: 4hrs
Prep Time Cookies: 15min
Cook Time: 90 min.
Skill: Super Easy
Servings: 42 pieces

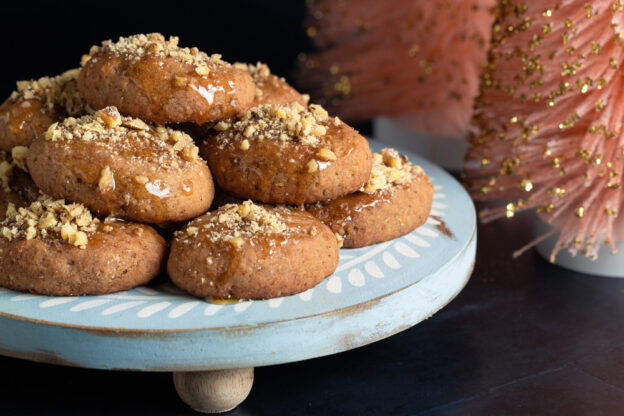
It’s the most wonderful time of the year!!! These amazing little orange and spice cookies soaked in honey syrup are a must for the Holidays, and baking them will fill your home with the heavenly scents of Christmas….cue Christmas music here! And what says Christmas more than melomakarona?
It’s believed that these cookies were served after funerals, known as a “makaria” in Greek, about five centuries before the birth of Christ. Later during the Byzantine Empire, they were soaked in honey “meli” and were consumed during the 12 days of Christmas. Today you can find them in every home and bakery in Greece during the Christmas Holidays.

What makes these cookies so good? It’s all about the syrup people!!! Soaking these cookies in honey syrup gives them their wow factor, and you know if a melomakarona cookie is really good because they are addictive; you just can’t stop at one!
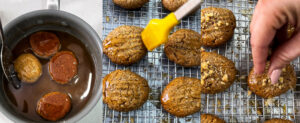
There are two ways to add the meli to your melomakarona: taking hot cookies straight out of the oven and soaking them in room temperature syrup or taking cool cookies and soaking them in hot syrup. Either way works but here at the bakery, we take the hot cookies fresh out of the oven and add them to a room temperature syrup, and that’s what Chris told me to do, so that’s what I did. These cookies were super easy to make, but you’ll need some prep time depending on how you add the meli to your melomakarona. Here at the bakery, we only use Greek honey in our melomakarona, and the honey you use will affect the overall taste of your cookies.

Right now, we have a great deal on fantastic imported Greek honey which comes in a two-for-the-price-of-one package, so buy one get one free for only CAD 24.99, which is perfect for these cookies as it gives them a great rich taste and is economical. It’s available in-store and online while supplies last. You can find it online here if you are ordering for pick up and here if you are ordering for shipping.

If your schedule is super busy, you’re not a baker, or you just want to spend more time with family and friends this Holiday Season, we got you! Click here to preorder some Serano Bakery melomakarona and any other goodies you may need this Christmas.

Live out of town and want to order some of our cookies and other goodies to be delivered to you or even shipped to your family and friends; we got you covered here too! Click here to order your Serano Bakery melomakarona and any other goodies for shipping anywhere in Canada and the USA. Cut off date for Christmas orders for shipping is December 9th, 2022.


Here’s everything you’ll need!

First, you’ll need a measuring scale. Here at the bakery, we use a scale to measure everything, including liquids. You’ll also need two bowls, at least two baking trays lined with parchment paper or silicon mats, and a cookie rack with another tray underneath so you don’t get syrup all over your counter. See our detailed list of things you’ll need below for more recommended baking paraphernalia.

About 3-4 hours before baking, prepare the syrup and set aside to cool.

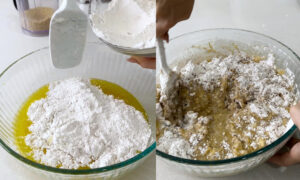
In the first bowl, sift the flour, add the remaining dry ingredients (except for icing sugar and baking ammonia), and whisk together. In the second bowl, add the wet ingredients, including orange zest and icing sugar. Be sure to dilute the baker’s ammonia into the orange juice before adding it to the wet ingredients. Make sure to use a large enough glass because the reaction from the baker’s ammonia will cause the orange juice to foam up, and you don’t want it spilling over as it did for Effie lol (see Instagram reel here).

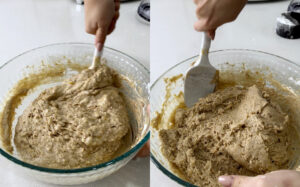
Using a spatula, slowly add the dry ingredients to the wet ingredients and then add the crushed walnuts. Mix until all the ingredients in the bowl come together. The mixture will be wet at first but will quickly come together to the point that you should be able to roll a ball without any mixture sticking to your hands. If the mixture is still a little wet and sticky, slowly add more sifted flour (about 1tbsp at a time) until the mixture is no longer sticking to your hands.

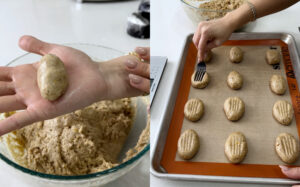
In this recipe, we’ve weighed out our cookies to approx. 40g each, but you can have them weigh anywhere between 35g to 45g. This recipe will yield 42 cookies at 40g each. Roll out each cookie into an oval/egg shape and fill a baking tray leaving about 1.5″ between each one. A 13″x18″ standard baking tray will hold 15 cookies. After rolling them out, take a fork and press down slightly on each cookie, leaving the imprint of the fork. This helps them bake more evenly and soak up more syrup. You could also poke them about four times on top with the fork and roll them over a spider strainer or a curved nut grater to achieve the same effect.

Bake times vary depending on your oven, but these usually take between 25-30min at 370℉. You want these cookies to brown slightly on the top but not to burn on the bottom. At 40g each, these took 28min in my gas oven at home.

Once done, remove from the oven and dip in the cooled honey syrup immediately. I do about 4-5 cookies at a time and let them soak, flipping them over about 3-4 times each. These cookies soak up the syrup fast, so you don’t want to leave them in there for too long otherwise, they could collapse or get super mushy. Test one first by breaking it in half and seeing if it’s still dry inside; you want them to be nice and juicy. These cookies need some time for the flavours to come together, and I find they taste way better the next day.

Melomakarona can be made ahead of time and are great for gifting. If you’re making these ahead of consuming/gifting, you’d let the melomakarona cool and then place them in an airtight container and refrigerate or in a cold room. My cold room (the uninsulated storage space under my front porch) gets as cold as a fridge during the winter months, so I put all my cookies in there to store until I assemble my little sweet gifts for Christmas. Once ready to serve or gift, brush the cookies with warm honey and sprinkle with crushed walnuts.
Enjoy!

Ingredients
• Syrup
• 400g water
• 400g sugar
• 400g honey
• 2 cinnamon sticks
• Rind of 1/2 lemon

Cookies
• 650g sifted all-purpose flour
• 150g fine semolina flour
• 1tsp baking powder
• 3tsp ground cinnamon
• 1tsp ground cloves
• 200g vegetable oil
• 100g olive oil
• 120g water
• 200g orange juice
• 1tsp baker’s ammonia
• 150g icing sugar
• Zest of 1 orange
• 25g cognac
• 1 cup crushed walnuts
• Extra honey and crushed walnuts for finishing

Note: This is a traditional melomakarona recipe and is not used here at the bakery. However, we tested this recipe several times, and it’s very, very good, and they are equally addictive!

Things You’ll Need
• Measuring scale
• Two large bowls
• Sifter
• Spatula
• 3 Baking trays
• Cookie rack
• Parchment paper or silicon baking mats
• Silicon pastry brush
• Potato peeler
• Measuring spoons
• Zester


Instructions
1. Place water, sugar and lemon rind into a medium pot and bring to a boil. Once boiling, add cinnamon sticks and honey, stir and remove from heat. Set aside and cool for 3-4 hours. Once cooled, remove the cinnamon sticks and lemon rind.
2. Preheat oven to 370℉.
3. In a large bowl, whisk together sifted flour, semolina, ground cinnamon, ground cloves and baking powder.
4. In a separate large bowl, add vegetable oil, olive oil, water, orange zest and cognac. Mix orange juice with the baker’s ammonia in a large glass or measuring cup. The baker’s ammonia will cause the juice to foam up. Add the orange juice mixture to the other wet ingredients in the bowl, then add the icing sugar and whisk together.

5. Slowly add the dry ingredients to the wet ingredients, and then add the crushed walnuts. Using a spatula, mix the ingredients. Do not over-mix the dough; just mix until it comes together. If your mixture is too wet and you can’t form a rolled ball in your hands without the dough sticking, add a little more sifted flour 1 tbsp at a time, until the dough no longer sticks to your hands.
6. Measure dough into a 40g ball for each cookie and roll it into an oval/egg shape. Place on a cookie tray covered with parchment paper or a silicon baking mat.

7. Bake in the oven for 25-30min until slightly golden brown on top.
8. Remove cookies from the oven and immediately place each cookie in the honey syrup flipping them over 3-4 times per side. Remove and place on a cookie rack over a baking tray to strain.
9. Place extra honey in a glass bowl and microwave until warm, and brush over each cookie. Sprinkle with more crushed walnuts.

Tips: Measure out all the ingredients carefully before mixing your ingredients. In one of our test kitchens, we were a little willy-nilly with our measurements, and we didn’t get the best-tasting cookies with that batch.

If you are storing these cookies in the fridge, we recommend removing them about 30 min before finishing them off with warm honey and extra walnuts.
Enjoy!!!
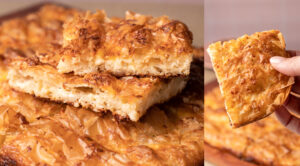
Patsavouropita – Wrinkled Filo Cheese Pie

Prep Time: 1h
Skill: Super Easy
Servings: 12-30

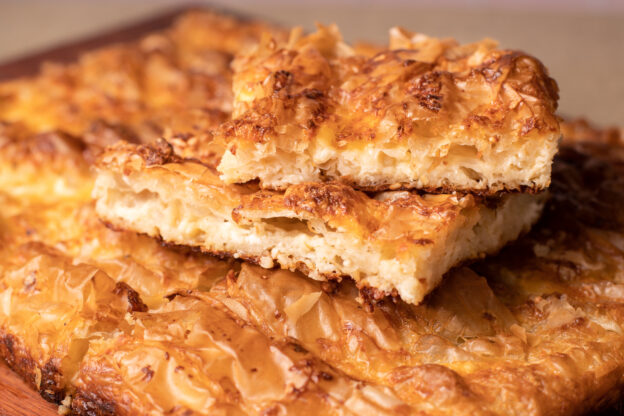
Spanakopita, tiropita, prasopita, kotopita, milopita, I could go on and on. The list of pita varieties is pretty long but personally I’d never heard of or ever tried a patsovouropita before until Gina came to me and said “I’ve got a pita recipe for you that I think you’ll really like, it’s quick and so easy to make!” The word patsavouri in greek means dirty rag or a squashed/wrinkled piece of paper. Gathering each sheet of filo with the cheese filling inside makes it resembles a used rag hence the name patsavouropita.

We test every recipe we share at least 3x and this was definitely a favourite of everyones in our test kitchen. We love this pita because not only is it so very easy to make but it tastes delicious too! This pita would also be great if you’re hosting a party and served up in mini bite size pieces.

Things You’ll Need
• 12 x16 Non Stick Baking Pan (Available Here)
– We use a thin non stick baking pan which allows you to get a nice crispy bottom and can be easily removed from the pan. This pan is perfect for pastichio and lasagne as well. We recommend using a plastic knife with this pan or carefully cut the pita in half and transfer each half to a cutting board and continue cutting in desired servings.
• Pastry/Silicon Brush
• Small Mixing Bowl
• Medium Mixing Bowl
• Sharp Knife (preferably plastic to be used as to not ruin your non stick baking pan)


Ingredients
• 10 Sheets of Filo Dough
• 250g Feta Cheese (grated)
• 250g Kaseri Cheese (grated)
• 250ml Souroti Sparkling Water
• 200ml Milk
• 4 Eggs
• 100ml Vegetable Oil
• 100ml Salted Buter (melted)

Directions
1. Preheat oven to 375F.
2. Grate feta and kaseri cheese (if you buy your kaseri from a deli/cheese emporium ask them at the counter if the can grate it for you) and combine.
3. In a small mixing bowl add melted butter with oil and combine.
4. Whisk eggs, milk, sparkling water and pepper together.
5. Using a pastry/cooking brush lightly dab/dribble butter mixture over one sheet of filo and sparingly sprinkle the cheese mixture evenly on top.
6. Starting from the top, take the sheet of filo and pleat/gather all the way to the bottom. Place in a non-stick baking pan with the cheese side facing up. Repeat 9 more times.
7. Evenly poor egg mixture over the filo and into the pan.
8. Sprinkle any left over cheese mixture on top and bake for 40 minutes at 375F until golden brown on top and bottom.
9. Let cool slightly, cut and serve.

Enjoy!!!

Kolokithopita – Greek Pumpkin Pie

Prep Time: 1h 15 min
Skill: Super Easy
Servings: 8-10

Kolokithopita is a pita traditionally made with kolokithia which is the Greek word for many of the vegetables from the cucurbits family such as zucchini, squashes and pumpkins. These vegetables are made into a filling and then wrapped in layers of filo dough to make a pie. Different regions in Greece have different versions of the kolokithopita for example; in the Peloponnese kolokithopita is a savoury pie traditionally made with zucchini and feta whereas in the northern part of Greece this sweet pie made with squash, walnuts and spices.

With Thanksgiving weekend coming up we wanted to share this quick and easy version of a sweet pumpkin pie pita. It’s super easy to make and is sure to please all the pumpkin spice lovers in your life!

Ingredients
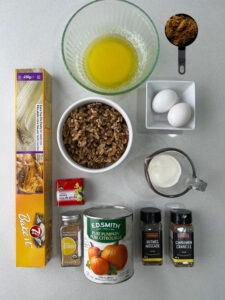
• 11 sheets of 7 Days Extra Fine Filo Pastry
• 500g of ED Smith Pumpkin Puree
• 1 cup walnuts, coarsely chopped
• 1/4 cup unsalted butter, melted
• 1/4 cup vegetable oil
• 1 cup of brown sugar
• 2 eggs
• 1/3 cup of heavy whipping cream
• 1 tsp cinnamon
• 1/4 tsp nutmeg
• 1/4 tsp ginger
• 1/8 tsp cloves
• Icing Sugar & Cinnamon (for dusting)

Things You’ll Need
9×14 Casserole Dish
Large Mixing Bowl
Pastry Brush
Small Mixing Bowl
Measuring Cup
Measuring Spoons
Spatula
Sharp Knife

1. Preheat oven to 425 degrees Fahrenheit.
2. In a small microwavable bowl melt butter and add vegetable oil and mix well.
3. Coarsely chop walnuts.
4. Mix eggs together.
5. In a large bowl add pumpkin puree, brown sugar, walnuts, cream, spices and mix together until all ingredients are incorporated.


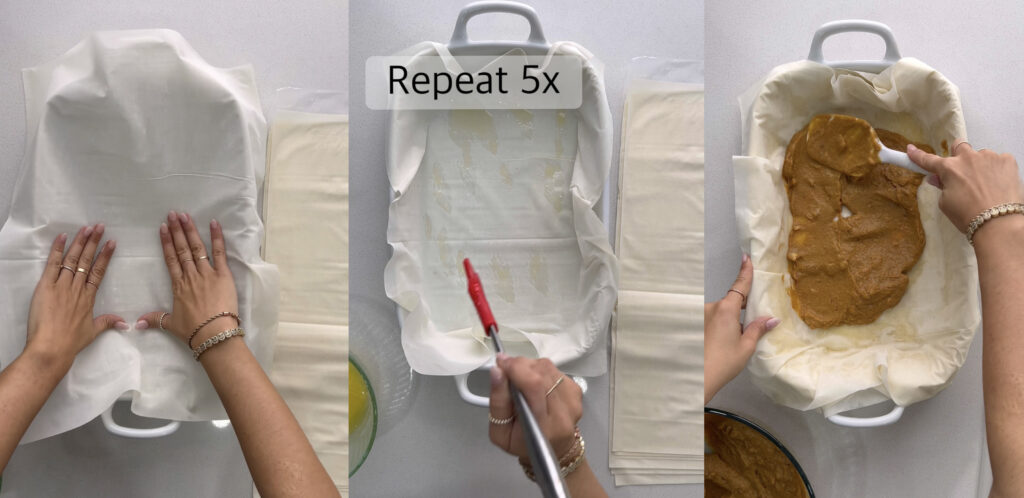
6. Place first layer of filo in casserole/baking pan with the extra overhanging the edges (you will need this to fold over your pita at the end). With your pastry brush lightly dot/brush the butter/oil mixture on the sheet of filo and up the sides (do not completely cover the sheet of filo in butter mixture as this will make your pita very greasy, less is best). Repeat 5x. Do not butter the last sheet of filo.
7. With a sharp knife slice remaining filo dough in half.
8. Spoon 1/3 of the pumpkin mixture into the casserole/baking pan and spread out.
9. Lay 1/2 sheet of filo dough over mixture and brush lightly with the butter/oil mixture as you did in step 6. Repeat 4x. Do not butter the last sheet of filo.
10. Add second 1/3 of mixture to the casserole/baking pan and cover with remaining sheets of filo one at a time and making sure to butter each one in between just as you did previously. Do not butter the last sheet of filo.
11. Repeat step 10 one more time with the remaining pumpkin mixture and filo dough. Do not butter the last sheet of filo.


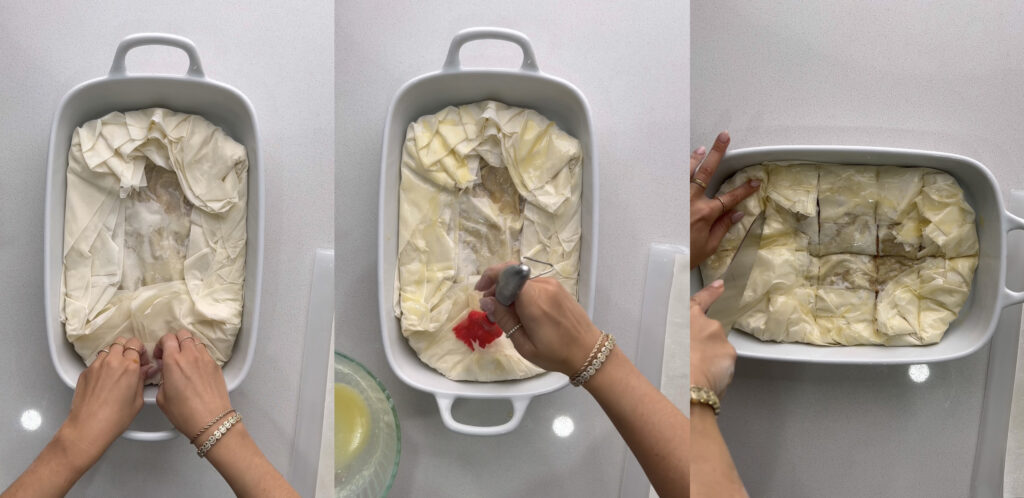
12. Take the overhanging filo dough and fold over beginning with long edges first and then the short edges.
13. Brush the top of the pita with the butter oil mixture making sure to cover the entire surface but don’t over do it.
14. With a sharp knife carefully cut your pita into your desired servings. You don’t need to slice all the way through to the bottom of the pita just the top and the layers in between the filling. Be careful and go slow so the filling does’t get all over the top of your pita.
15. Place pita in the oven and bake for 15 min at 425 then reduce heat to 350 for remaining 30 min.
16. Once your pita has cooled run a sharp knife over the previously scored slices and cut right though.
17. Sprinkle with icing sugar and cinnamon and serve.
Enjoy!!!

Tips: You can substitute pecans for walnuts and even add some brandy soaked raisins if you like.